Adobe Modeler Review
by Ben Huckaby
Ever since Adobe released Substance Modeler 3D in late 2022, I have been very interested in trying it out. I have been using various 3D modeling and animation software since the early to mid 2000s and after finally getting a solid handle on ZBrush over the past 2 years the idea of having a more user-friendly high poly sculpting program that was already integrated into the Adobe suite was a selling point all by itself, let alone the added benefit of being able to sculpt in VR! I tried to remind myself that this was still an application in its early stages but I would be lying if I didn’t say I had pretty high expectations going into this.
Let’s start off by briefly talking about what Modeler is and what the goals were, as that is important to keep in mind. Modeler is meant to be a 3D software with a minimal, easy to learn interface that could seamlessly switch between desktop and VR while maintaining the same functionality across both modes. Considering other popular high poly digital sculpting applications in this space (ZBrush, Mudbox, and Blender to name a few) and the steep learning curves they each have, the idea of an easy to use modeling and sculpting program certainly is a welcome one, and being able to also work in VR adds a new level of creativity to it.
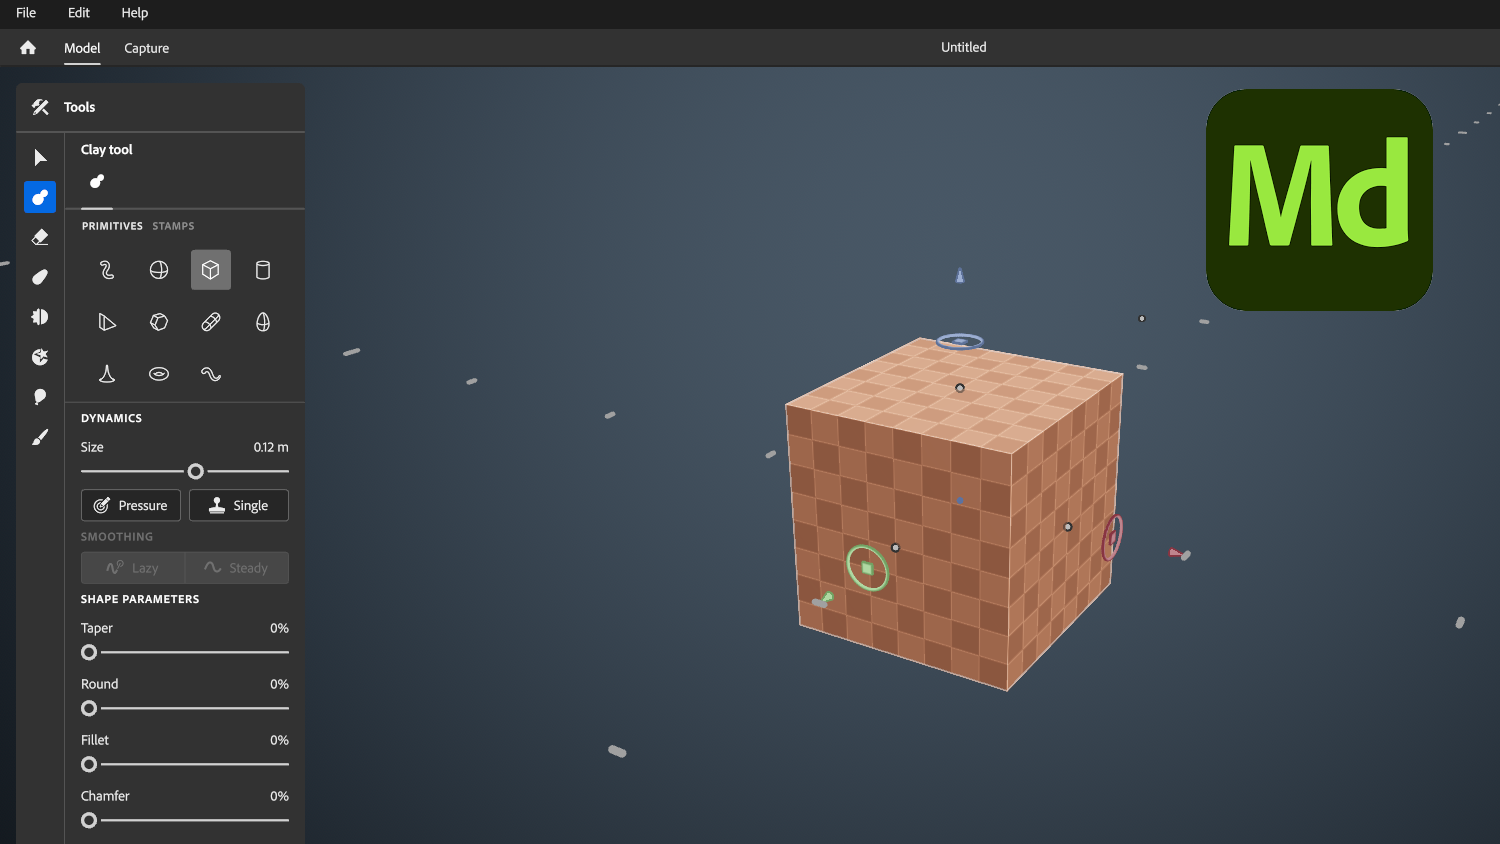
Modeler does succeed in having a very simple interface and the learning curve is definitely one of the smallest I have ever seen in any 3D software. Within an hour of installing the application I was already creating things and had at least some idea of what all of the menu buttons did (by comparison I’ve used 3ds Max for nearly 20 years and still have no clue what a large amount of the options are, and we won’t even talk about ZBrush’s UI). This simplicity is a bit of a double-edged sword, though, as I ended up feeling limited in what I could and couldn’t do because many more traditional sculpting and modeling tools and abilities just weren’t there (for example, working at a vertex level isn’t an option, nor is doing anything like an extrusion).
This probably stems from the way that Modeler works at its core. Unlike other 3D programs Modeler doesn’t use polygons or NURBS, but rather Signed Distance Fields (SDFs), so it handles a 3D scene as voxels instead of a connected network of vertices or points. Polygons are still used to render sculpts in the viewport, but the times you actually see these polygons (or any topology) are so few and far between that they are practically non-existent. The voxel resolution on any particular mesh can be increased or decreased at any time so you can have the right level of detail when you need it (and it’s easy to do), but without doing any sculpting operation you won’t really be able to tell what resolution your mesh currently is (which makes for a lot of Undo operations).
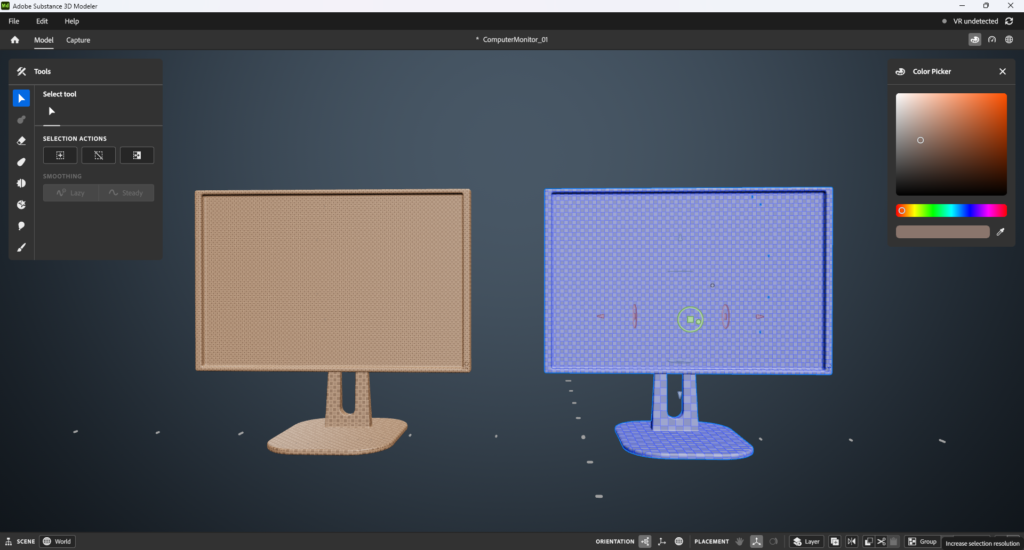
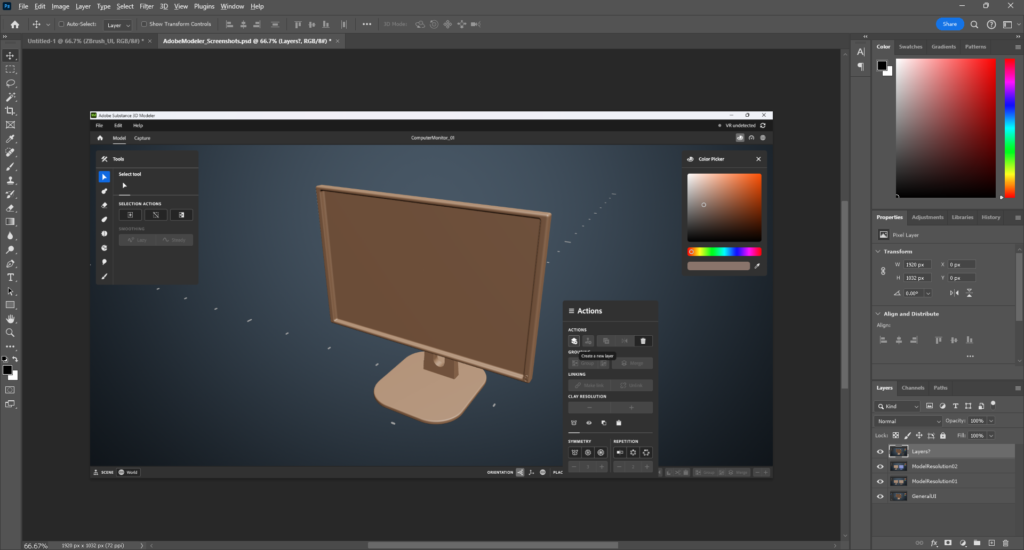
Another oddity of Modeler is its layer system. Modeler relies on layers as an integral part of its workflow, and they are a great way to easily isolate and mask out one or more objects for sculpting while the rest of the scene remains untouched. With such a heavy emphasis on using layers conventional wisdom would suggest that there would be an intuitive way to view what layers exist and be able to manage them, right? I mean, Adobe already has a plethora of professional design software that have a myriad of good layer implementations to choose from so this should be an easy slam dunk for them.
So what do they do with Modeler? Layers are not visible, ever. There is absolutely zero way to tell what layers you have, what layer you’re on (or at least not if you don’t have any mesh selected), or anything of the sort. Selecting a mesh will activate that layer and mask out all other layers, or if you start sculpting without any layer selected the work will go across all layers and affect everything in the scene. Likewise, selecting multiple meshes/layers will only have your work apply to those meshes and leave everything else out. Also, new layers are not automatically generated for some operations (but they are for others), so you do have to keep mental tabs on how you want your projects’ layers (that you can’t see) to be organized. The auto masking is really nice but without any visibility into the existing layers and structure it seems like Adobe only got halfway there with this implementation, and I can’t figure out why this decision was made (and I hope they implement a layer view at some future time if the product survives).
So, OK, there may have been some weird UX decisions made, but, hey, they managed to make a 3D software that can be learned quickly and takes less time to churn out a model (even if it is rather clunky and precision is just, well…OK, it doesn’t exist), plus it’s super fun in VR! And we won’t even talk about the “paint” feature that shouldn’t have even been included because Substance Painter already has that covered. This will be a great product for folks wanting to do high detail sculpting without the hassle of months and months of learning a UI and production workflow, all we have to do is export our model to our game engine or application of choice and we’re good, right?
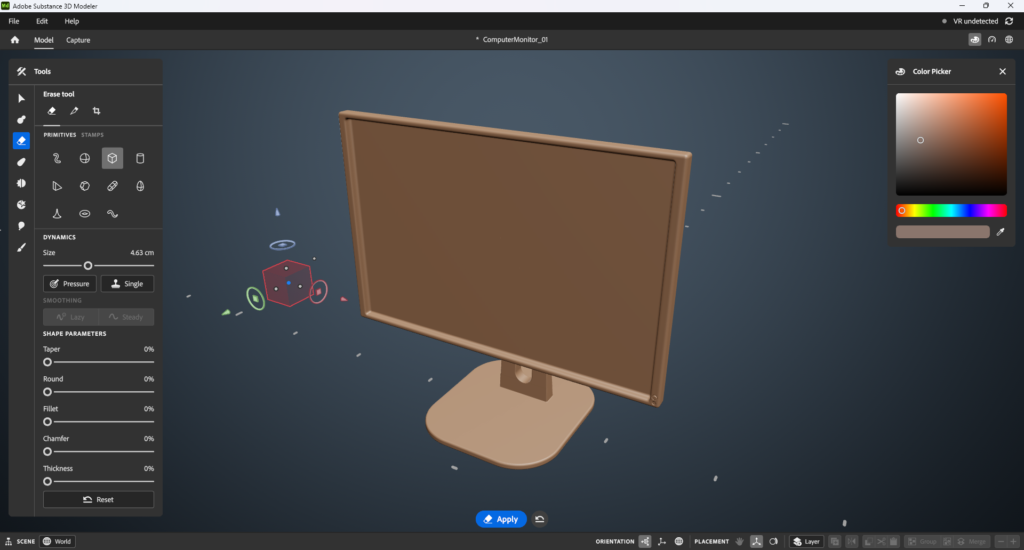
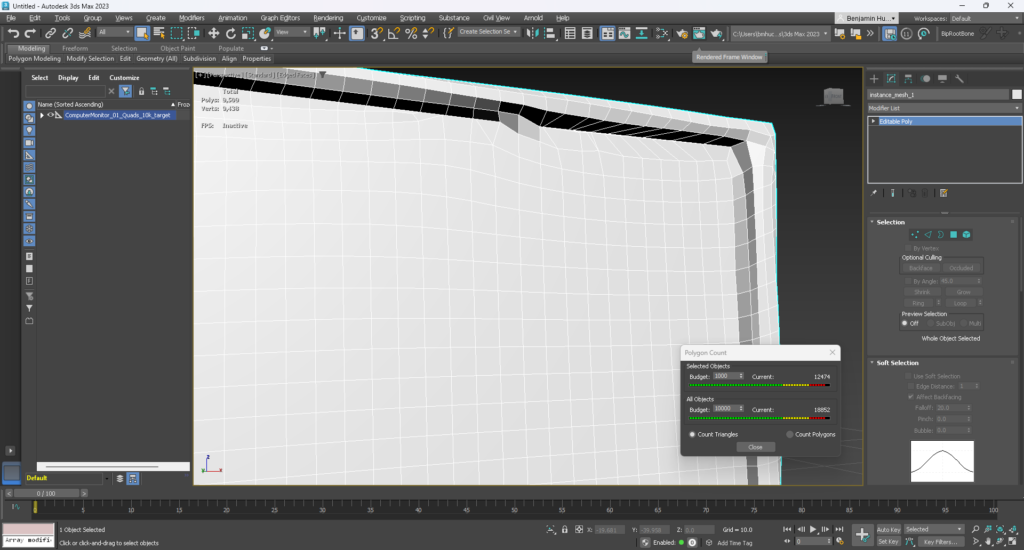
So, about that. When you export a model from Modeler to a format usable by practically anything else (e.g. a polygonal mesh in the form of an FBX, OBJ, gLTF, or one of the few other supported formats) you will have the option of exporting the raw mesh data (no decimation applied) or setting a polygon target for the output mesh (if you’ve used ZBrush, this is pretty similar to ZRemesher). To experiment with this I first tried making a simple flat panel computer monitor model, thinking that even if the exporter got crazy with the detail the model is so geometric and simple that it couldn’t be more than 10-20k triangles. Let’s see what the result of a raw export to 3ds Max looks like!
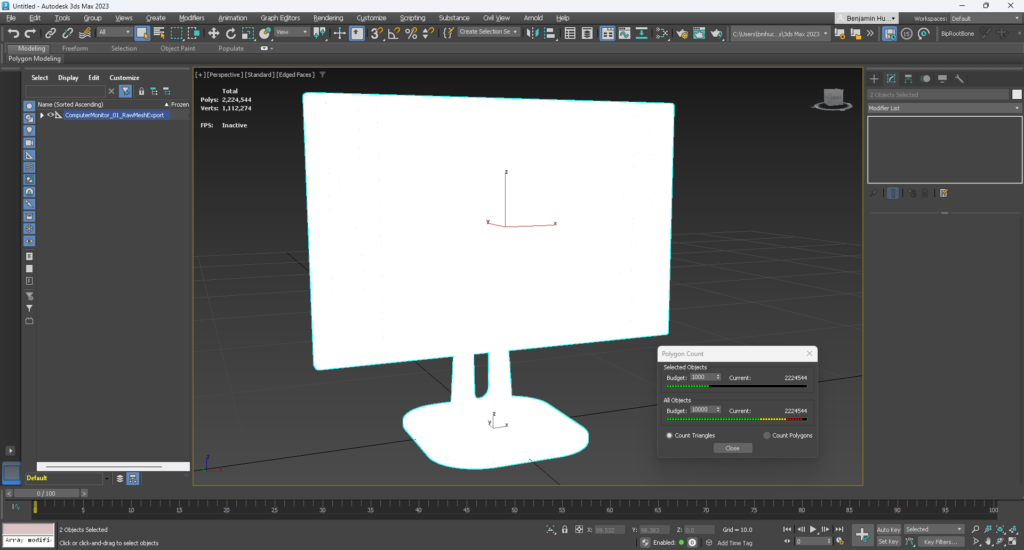
This is with wireframe overlay turned on, so what we are seeing here is not a material, it’s the wireframe of the output mesh being so dense that the surface itself is obscured. The resultant mesh is 2,224,544 polygons. For a model that will probably just be scene dressing in the background. Oops. But, hey, that’s the raw export, it will be better if I set a polygon target!
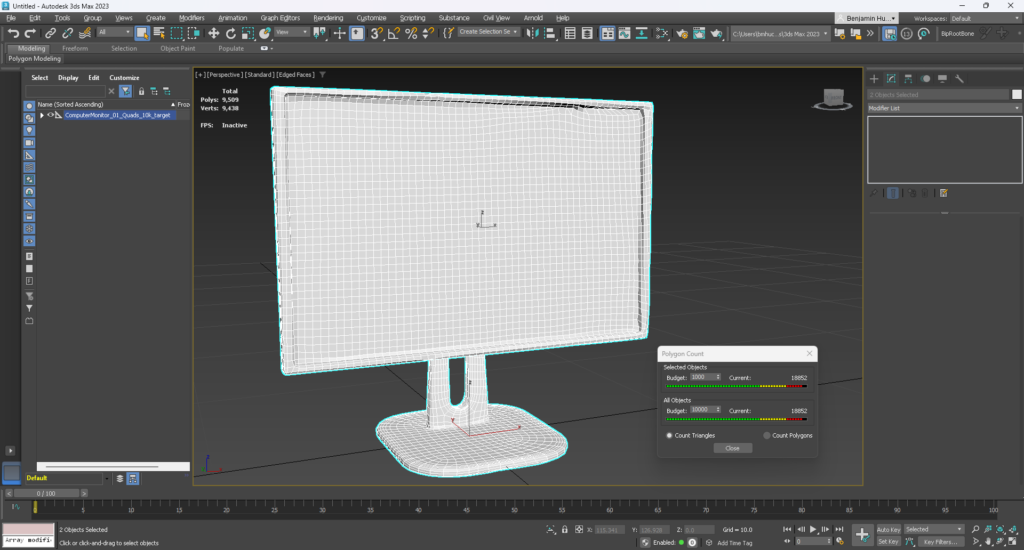
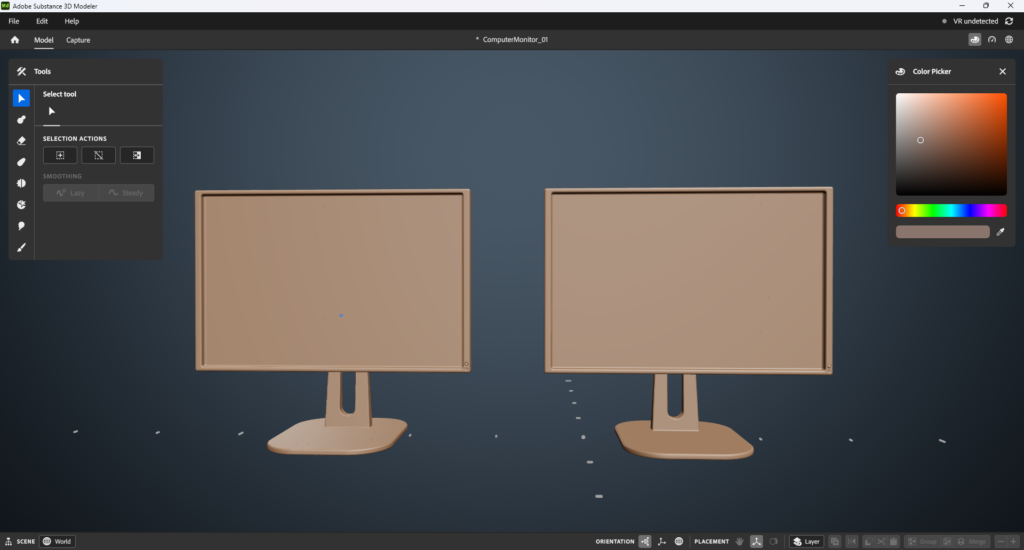
Setting a limit of 10k polygons (which is very generous) I was impressed that Modeler (unlike ZBrush) actually honored that limit and stayed under it. However, I think I would have preferred ZRemesher’s default attention to form and topology (at the expense of typically going over budget) to the rigid poly limit that Modeler uses, especially when the topology produced by Modeler for something as simple as a flat screen with a beveled inset is just so bad. As in, straight edges become wonky jumbled messes, vertex rings make very little sense with their placement, and the form itself is so sloppy that I wouldn’t be comfortable having this asset appear anywhere even remotely near a scene camera. If I were working in a real time production environment I would spend more time completely rebuilding the mesh from the ground up in my 3D software of choice than I would potentially save by trying to use the (overly) simplified modeling and sculpting tools in Modeler. And there’s no chance of this producing anything worthy of being rigged or animated (to be fair, though, ZRemesher is not the best for that, either, but it still produces more usable topology than this).
What about a model that is made in another application and imported into Modeler? This is supported (but mesh only, no texture data), and these models can be converted to Clay (what Modeler calls its SDF meshes) at the cost of losing some detail, but once they are converted they can be sculpted and stamped like anything else. So what would happen if we imported an externally made model, convert it to Clay, do nothing else to it, and then re-export it back to the original program?
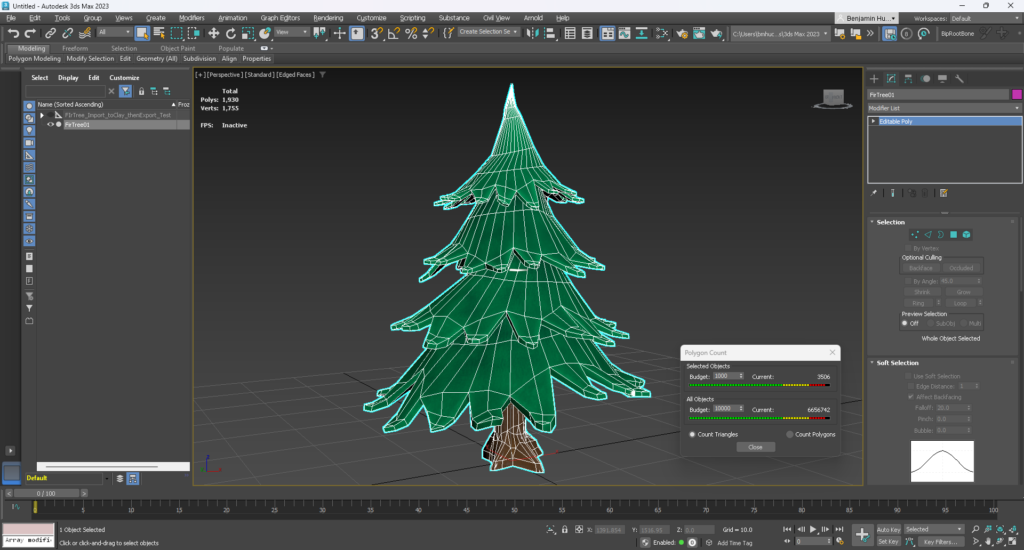
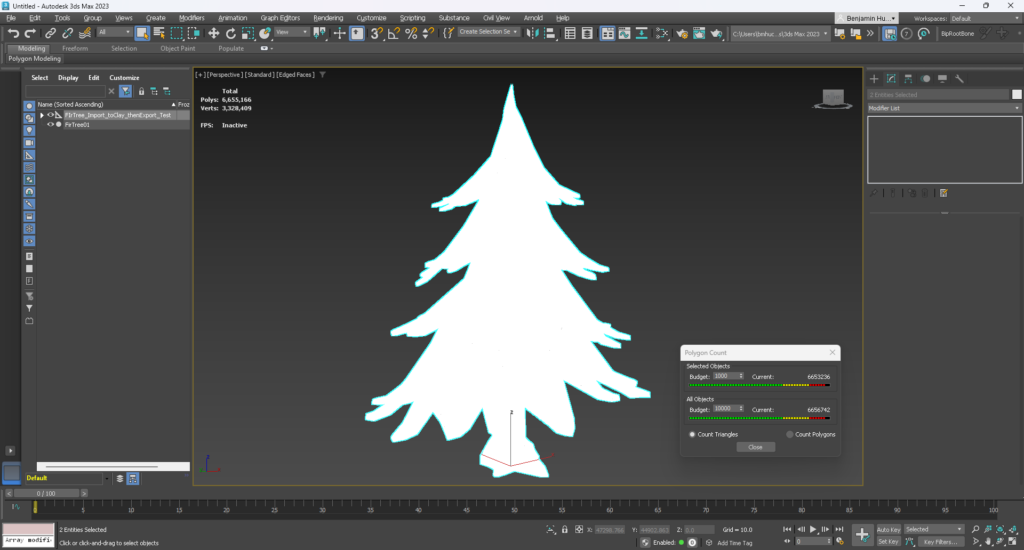
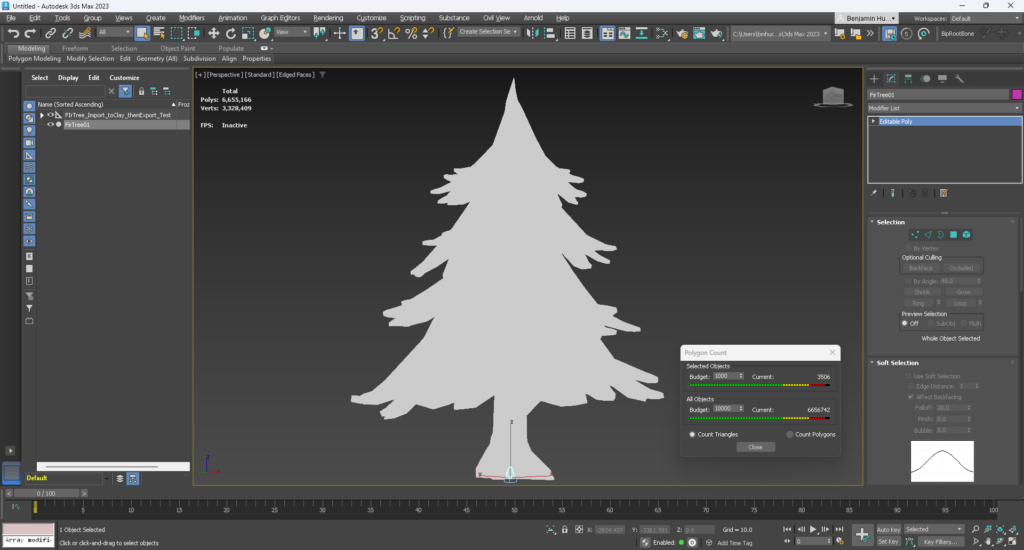
The answer? A whopping 1,897.7-fold increase in triangle count from 3,506 triangles to 6,653,235 triangles, all while detail was lost in the process (Modeler’s documentation does warn that the Clay conversion process will cause a loss of detail in imported meshes). And a massive scale increase, but that one is on me for not setting the units properly between the two programs, so I won’t blame Modeler for that. It still makes for a hilarious comparison, though, as you can see the cyan outline of the original tree model compared to the hulking gray wireframe of the exported tree in the screenshot below.
Alright, so you’re not going to get efficient meshes out of this, and good topology is not an option, either. The brushes feel kind of clunky because all of the brushes are actually 3D primitives that you manipulate into different shapes and then affect the SDF space with (meaning brushes can and will inadvertently go through a mesh and produce unwanted results on the other side, especially in the rudimentary paint mode). And all of this seems to slow even powerful computers down. So what exactly is Modeler good for?
Well, if you want to sculpt a prototype or something in VR…or, honestly, just rapidly preview a static mesh that you made elsewhere in VR without messing with any game engine or whatnot, Modeler is fun for that. But if you need to do anything precise, produce a model that will ever need to run in a real time environment and/or have sensible topology, or do any intense hard surface/precise sculpting…Modeler is going to be more trouble than it’s worth. If you’re already familiar with ANY other tool that does high poly sculpting, Modeler is likely not for you.
Honestly, Modeler at this point may still be too much of an oddity to realistically factor into any production pipeline. I see a few flashes of potential, especially with the VR sculpting, but the product as a whole feels like an early beta application that was released as a production build and is very undercooked as a result. If you already have it as part of your Adobe Creative Cloud plan and have some free time to check it out (especially with a headset) I would say go for it, but at this time I can’t recommend going out of your way for it.
- Categories: